Vacuum and pressure forming both shape heated thermoplastic sheets over a mold, but they use air differently. In vacuum forming, a vacuum draws the softened sheet against the mold surface. Pressure forming adds compressed air above the sheet, pushing it into finer contours. A useful starting point is to ask: what is the difference between vacuum and pressure forming? The answer affects more than the machine. It can influence part detail, tooling choices, production cost, and how well a design suits its intended use. The difference matters.
A broad, shallow cover may work well with vacuum forming, while a housing with ribs, recesses, or sharper edges may benefit from pressure forming. Pressure forming can capture more detail, though it often requires more specialized equipment and careful process control. Vacuum forming is generally simpler, but its results still depend on sheet thickness, mold design, heating, and part geometry. Details matter. Neither method is automatically better. The right choice depends on the part’s appearance, strength, quantity, and budget. Even a promising design can behave differently when formed at full scale. That part is easy to overlook. Before selecting a process, compare sample parts, tooling costs, and production requirements with a qualified forming supplier. Ask how the material will thin around corners, and whether the finished surface needs additional work. There is no universal winner; a practical comparison starts with the actual part, not just the process name.
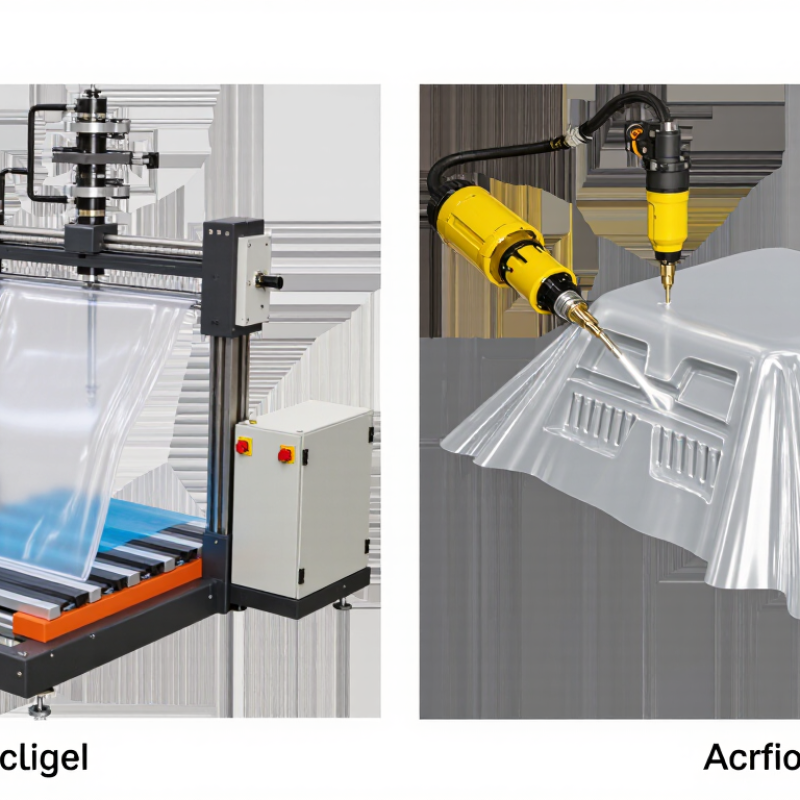
Define the Methods: Vacuum Forming Is Limited to 14.7 psi Differential at Sea Level
Vacuum forming heats a thermoplastic sheet, then draws it against a mold by removing air. Its theoretical pressure difference cannot exceed the surrounding atmospheric pressure. NIST gives standard atmospheric pressure as 101.325 kPa, or about 14.696 psi, at standard sea-level conditions. That is the familiar 14.7 psi ceiling—not a guaranteed production force.
Real forming pressure is often lower. Elevation reduces atmospheric pressure, while leaks, imperfect seals, and hot material can further affect results. A sheet may look snug over a shallow mold yet bridge across a deep corner. Pressure forming adds compressed air above the sheet, increasing the force pushing it toward the mold. The methods are not interchangeable: mold depth, surface detail, material thickness, and equipment capacity all matter. The 14.7 psi figure is a useful limit, but it can oversimplify shop conditions.
Tips: Check local barometric pressure and measure the actual pressure differential across the sheet. Record material temperature and cycle settings during trials; small changes can shift corner detail. NIST’s standard-atmosphere value is a reference point, not a process specification.
Compare Forming Pressures: Pressure Forming Often Uses 60–100 psi Compressed Air
Pressure forming differs from vacuum forming mainly in the force used to push softened plastic against a mold. Vacuum forming draws air out from beneath the sheet; atmospheric pressure then supplies the forming force. NIST gives standard atmospheric pressure as 14.696 psi, which sets a practical limit on vacuum-only forming. Pressure forming commonly uses 60–100 psi of compressed air, according to ranges reported in Society of Plastics Engineers thermoforming technical literature. That added force can capture sharper corners and finer surface details. It also demands suitable tooling and a machine rated for the operating pressure.
Tips: Check the machine’s actual pressure at the mold, not just the compressor gauge. Leaks, long air lines, and clogged filters can reduce pressure. A small drop matters.
Higher pressure is not automatically better. Material temperature, sheet thickness, mold venting, and cycle time all affect the result. The U.S. Department of Energy’s compressed-air guidance identifies pressure control and system leaks as key efficiency concerns; in practice, excessive pressure can waste energy without improving the part. Compare sample parts under the same material and heating conditions. Measure detail, wall thickness, and repeatability. One limitation: published pressure ranges are guides, not guarantees, and individual machines vary.
How to Compare Vacuum and Pressure Forming? — Compare Forming Pressures: Pressure Forming Often Uses 60–100 psi Compressed Air
| Comparison Dimension |
Vacuum Forming |
Pressure Forming |
| Forming pressure |
Vacuum draws the heated sheet against the mold. At sea level, the theoretical maximum pressure difference is about 14.7 psi; actual forming pressure is lower and varies with vacuum level and process conditions. |
Compressed air is commonly supplied at approximately 60–100 psi in pressure-forming systems. The pressure acting across the sheet depends on the machine setup and opposing vacuum; supply pressure is not necessarily the net pressure on the sheet. |
| How the sheet is formed |
A vacuum pulls the softened sheet onto or into the mold, allowing atmospheric pressure to push the sheet toward the evacuated area. |
Compressed air pushes the softened sheet against the mold, often with vacuum assistance on the opposite side. |
| Feature detail |
Suitable for many shallow-to-moderate shapes, broad contours, and designs with relatively modest surface-detail requirements. |
Higher forming pressure can reproduce finer surface details and sharper features, provided the material, mold, and process are suitable. |
| Typical tooling considerations |
Tooling can be comparatively simple for suitable parts. Mold design still needs to account for sheet thickness, draft, venting, and expected production volume. |
Molds and clamping systems must withstand higher loads and pressure. Tool construction and venting requirements depend on the part and machine. |
| Equipment requirements |
Requires a heater, forming station, mold, and vacuum system sized for the sheet and part geometry. |
Requires pressure-rated forming equipment, a compressed-air supply, suitable clamping, and often vacuum capability as well. |
| Common applications |
Packaging, trays, covers, liners, and larger parts where the required detail and geometry can be achieved with vacuum forming. |
Enclosures, equipment housings, control panels, and other parts that benefit from more defined surface details or sharper features. |
| Choosing between them |
Consider vacuum forming when part geometry and detail requirements are achievable with the available vacuum level and a simpler tooling approach is appropriate. |
Consider pressure forming when the design needs greater detail or definition and the added equipment and tooling requirements are justified. |
Note: Pressure ranges are general industry guidelines, not universal machine specifications. Actual values and results vary with equipment, material, mold design, part geometry, and process settings.
Evaluate Detail: Higher Pressure Can Reproduce Finer Features and Textures
How to Compare Vacuum and Pressure Forming?
For fine detail, pressure forming usually has the advantage. Compressed air pushes the heated sheet against the mold, helping reproduce small ribs, sharp lettering, and pebbled textures. Vacuum forming pulls the sheet toward the mold instead.
At sea level, NIST gives standard atmospheric pressure as 101.325 kPa, or about 14.696 psi; this limits the maximum pressure difference a vacuum can create. That is a useful physics benchmark, not a guarantee of finished-part detail. Sheet temperature, mold venting, material thickness, and draw depth all matter. A crisp texture can still come out soft.
Tips: Test the actual resin and surface pattern before committing to tooling. Use a small coupon with the intended texture, then inspect it under angled light. Record sheet temperature and pressure for each trial. It may take more than one attempt.
Higher pressure can reveal detail, but it can also expose flaws: uneven heating may thin corners, and trapped air can leave marks. Industry thermoforming guidance from the Society of Plastics Engineers emphasizes process and mold design alongside forming method. Compare sample parts, not just machine pressure ratings. A shallow grain pattern may reproduce well under vacuum; deep lettering often needs pressure forming and carefully placed vents. Small details matter.
Compare Tooling, Cycle Time, and Cost for Different Production Volumes
Vacuum forming usually keeps entry costs lower: a single-sided tool can be made from machined board, cast resin, or aluminum. Pressure forming adds compressed air and often needs a stronger tool, but it can reproduce sharper ribs, lettering, and textured surfaces. For a short run of large covers, that simpler setup may matter more than a faster cycle. Small runs favor flexibility.
Cycle time is not just the forming step. Heating a thick sheet, cooling deep draws, and trimming edges can dominate the schedule in either process. Pressure forming may need extra setup and tool investment, while improved detail can reduce secondary finishing. A warm, thin corner can still distort; shop trials matter. I would not treat any generic cycle-time estimate as a guarantee.
Volume changes the calculation. The Plastics Industry Association’s 2023 Size and Impact report puts U.S. plastics industry shipments at $548.1 billion in 2022, but this is industry-wide context, not a forming-cost benchmark. Compare quotes using the same resin, part geometry, annual quantity, and finishing requirements. At low volume, prioritize tooling and setup costs; at higher volume, weigh cycle time, scrap, and labor across every part. Small differences add up.
Select a Process by Part Geometry, Material, and Required Surface Finish
Vacuum forming pulls a heated thermoplastic sheet against a mold by removing air. Pressure forming adds compressed air to press the sheet more firmly into the tool. That difference matters most when a part has ribs, lettering, or sharp transitions. Details matter. Vacuum forming often suits large, relatively simple covers and trays. Pressure forming can reproduce finer features, but results depend on tool design, sheet thickness, and how evenly the material heats.
Geometry sets the first constraint. Deep draws and tight corners can thin the sheet, so check wall thickness and add generous radii where possible. Undercuts may require a split tool or a different design; neither process makes them disappear. Material choice also affects forming temperature, stiffness, and achievable detail. Confirm the intended resin and thickness with the forming supplier before finalizing a part. For surface finish, the mold is the reference: a polished tool can create a smooth face, while a textured tool transfers texture. Pressure can sharpen molded detail, but it cannot correct a poorly finished tool. I would not treat this as a clean rule. A simple part may still need pressure forming for its finish, while a detailed feature may be impractical at a given thickness. Test a representative section before committing to the full mold.
Conclusion
Understanding what is the difference between vacuum and pressure forming starts with how each process moves heated plastic over a mold. Vacuum forming draws air from beneath the sheet, using atmospheric pressure to pull the material into shape. At sea level, the maximum pressure difference is about 14.7 psi. Pressure forming adds compressed air above the sheet, often at 60–100 psi, to press the plastic more firmly against the tool.
The added pressure can capture finer details, sharper edges, and more pronounced surface textures, while vacuum forming may suit simpler shapes and less demanding finishes. The best choice also depends on tooling cost, cycle time, production volume, part geometry, and material. Comparing these factors helps match the process to the desired appearance and performance without paying for capabilities a part does not need.

 Switara Packing